
Heat tape installation often looks easy. You grab a roll, follow the instructions on the box, plug it in before the first freeze, and enjoy a winter without worrying about ice dams, right? Right until you have a problem. For some homeowners, the DIY installation holds up for a season. For others, it never quite does the job. The ice dams it was supposed to stop, build up as if the cable weren’t there at all.
The difference between a DIY heat tape setup and a professional installation may appear minor on the surface. But it shows up in the small, sometimes imperceptible details, including the accessories, the placement, regulation, and experienced support to troubleshoot any problems that arise.
Before you pick up supplies from your local big box store to install heat tape on your roof, you should understand what often goes wrong.
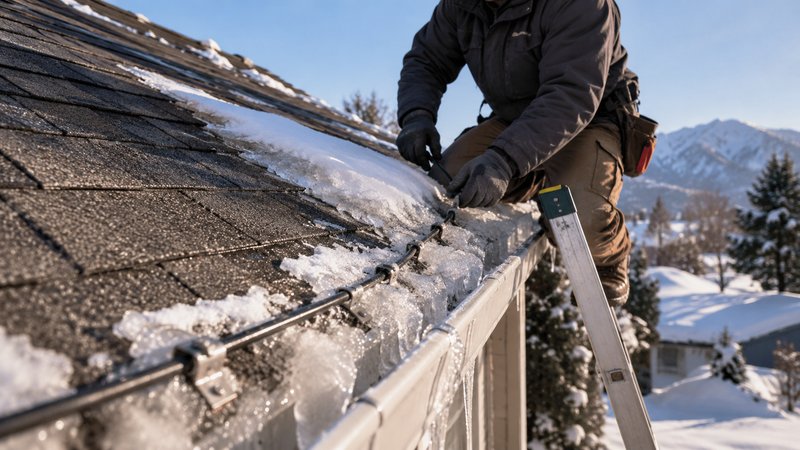
Consumer-Grade Clips
Big-box heat tape and professional-grade heat cable are not dramatically different at the core. The heating performance of the cable material itself is reasonably close between consumer and professional products. The real differences start with what surrounds the cable.
Clips are a common way to attach heat tape to roofing materials, like asphalt shingles. Consumer-grade heat tape kits come with basic clips that are often lightweight, thin metal. They hold up well when the install is new, but over time, they can bend, loosen, or break off entirely. When the clips fail, the cable shifts out of position. Suddenly, the cable that you carefully placed along the eave or through the gutter ends up somewhere else, where it can’t do its job properly.
Improper Placement
Heat tape works by warming the path water takes as it flows off the roof, keeping it clear of snow and ice. To do so, the cable needs to run along the eaves and rakes (the angled edges of the roof), through the valleys where two roof planes meet, and through the gutter and downspout system.
If you leave any of those areas unprotected, you have a vulnerability. Water may still flow until it reaches an uncovered, cold section. A single cold, low spot without heat tape is all an ice dam needs to get started, even if the rest of the roof has cable.
Getting the layout right requires understanding where ice dams are most likely to form on your specific roof. Most homeowners doing their own installs focus on the obvious horizontal eave line and stop there. However, spots like valleys are a common problem area, particularly if the valley flows into a lower-pitched section that drains slowly.
Correct placement isn’t something you can figure out from a box diagram. It comes from experience with how different roof shapes behave in freeze-thaw conditions.
Lightweight Hardware
The cable itself is just one part of the system. However, the system’s long-term performance depends on the hardware that supports it and protects it at stress points.
Professional installers use heavy-duty clips designed to stay put through years of freeze-thaw cycling. They also include cable guards at points where the cable experiences the most wear, such as where it transitions off the roof or turns into a downspout. Cable guards protect the cable from rubbing against hard surfaces, helping extend the life of the entire system.
The downspout transition is one of the most common failure points in DIY heat tape installation. The cable runs down through the downspout and back, making a sharp turn at the bottom before returning. Without a cable guard protecting that section, the outer coating can wear through from friction and expansion over several seasons. Once the coating is compromised, the cable’s performance drops.
Because you can’t see it inside the gutter, you often won’t know about the damage until the ice dam forms. Consumer kits skip these accessories or include a thinner version. The result is a cable that performs well when new and degrades steadily from there.
Manual Control
A self-regulating system turns the heat cable on when temperatures drop to the point where ice can form and turns it back off when conditions warm back up. It does this automatically, without any input from you.
Most DIY heat tape setups don’t include this. You’re managing the cable manually, which means two things go wrong regularly. The cable runs during warm stretches when it doesn’t need to, which costs money. And it sits unplugged during cold snaps because keeping up with manual management is easy to lose track of, which means ice forms.
Professional installations include a thermostat or temperature controller as a standard component. That added control layer keeps the system aligned with real-time temperature changes throughout the season, reducing the need for manual decisions. The result is a system that responds as conditions shift, rather than depending on you to actively manage it.
Early System Failure
One of the more common issues reported with consumer heat tape is that it stops producing consistent heat after a season or two of use. The cable may still look fine on the surface, with no obvious breaks or damage, but it no longer performs the same way it did when it was new.
In many cases, this kind of decline is tied to how the system was used and installed. Heat tape is exposed to repeated freeze-and-thaw cycles, as well as other weather extremes. Over time, the combination of freezing weather, high temperatures, and UV exposure can lead to gradual wear that isn’t always visible right away. In DIY setups, installation factors such as loose placement, tight bends, or overlapping sections can also add stress to the cable and shorten its usable life.
Moisture exposure and general weathering can also contribute, especially when the cable’s outer protection begins to break down. Performance often fades gradually, which makes it harder to notice until colder conditions return and you suddenly realize your heat tape isn’t melting the ice on the roof.
When the Cheapest Option Costs the Most
The hardware store kit can be the cheapest way to get heat cable on your roof. But when you compare the cost of a DIY kit to a full professional install, you’re not comparing the same product. A professional installation includes:
- Professional placement across the full roof
- Durable clips and cable guards
- A self-regulating thermostat
- A workmanship warranty
A kit, on the other hand, generally provides the basic materials needed to attach the heat cable and plug it in. That leaves the layout, control, and long-term reliability up to the installer: you.
That difference between installing heat cable yourself and hiring a professional becomes more important over time. If a DIY system stops performing as expected after a season or two, the cost is no longer just the price of the original kit. The cost may also include repairs and interior damage that the system was meant to prevent.
What starts as the lowest upfront cost can end up carrying a much higher total cost when reliability isn’t built into the installation from the beginning.